
We are among the tier of homebuilders that have embraced building science as an integral part of our guiding principles since our humble beginnings over three decades ago. Unfortunately, we’ve been in the minority through the years and have witnessed the effects of builders not investing the additional time and money it takes to create homes that are healthy, high-performing, and well-built to stand the test of time.
We recently completed a whole-house renovation on a home in Houston’s high-end River Oaks community, and what we found behind the home’s original stucco was a cautionary tale for every homeowner and builder. Here are some photos of the moisture damage and mold that was lurking behind the incorrectly installed 30-year-old stucco façade.
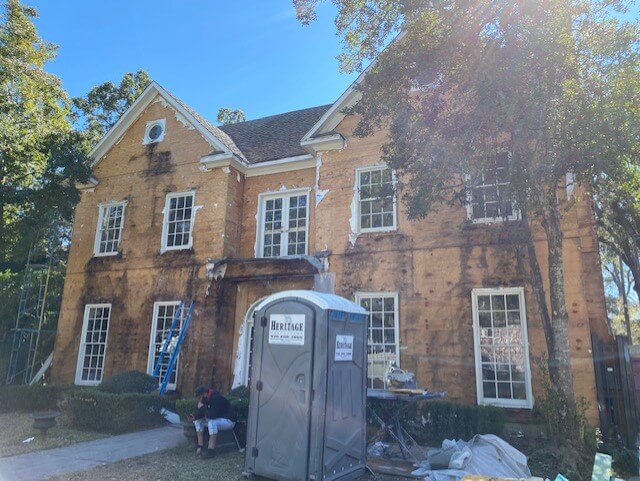
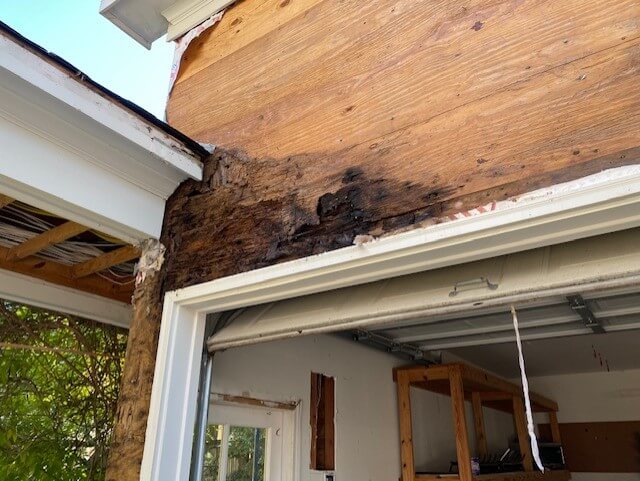
From these photos, you can gather that there is a RIGHT way and a WRONG way to install stucco on the exterior of a home. We’re going to share with you the basics of what to make sure your custom builder is doing if the exterior façade of your home is clad in stucco.
If you’re a “skip to the end” kind of person, here’s the gist:
A high-quality custom builder in this day and age should always install a drainage mat or rainscreen to create a drainage plane and ventilation space behind their stucco installations. No exceptions. No excuses. No shortcuts.
First a little background… When stucco gets wet, it absorbs water and can hold that moisture for a while. Sometimes it will dry to the exterior and sometimes, under specific weather conditions, it can be driven inwards. When the latter happens, the ventilation space created by specific building materials and methods is the only thing keeping the absorbed water from making its way into the walls of the home. The drainage plane (or ventilation space) behind the stucco allows the water to drain down the wall behind the stucco to the ground instead of working its way into the house.
So what layers should be included in proper stucco installation on a wood-frame home? Moving from interior to exterior, the layers should include:
- Plywood sheathing
- Water barrier (i.e. Tyvek, Zip System, etc.)
- Rainscreen or drainage mat
- Lath
- Stucco scratch coat
- Stucco finish coat
On wood-frame homes with stucco, the International Residential Code (IRC) only calls for a “water-resistive, vapor-permeable barrier with a performance at least equivalent to two layers of Grade D paper.” The code does attempt to recommend a drainage plane between the two layers by integrating flashing with the first layer of building paper, however this two-layer plus flashing method has proven insufficient in protecting the sheathing behind stucco from moisture damage in our climate. So having a builder who simply builds “per code” is often NOT enough to ensure high-quality construction and longevity of your custom home.
The point is, a custom builder who prioritizes building science best practices will make sure that a sufficient drainage gap behind stucco is achieved, either through the use of a drainage mat or rainscreen.

There are other tips for success when installing stucco and abiding by them requires both a qualified subcontractor AND proper oversight of an experienced custom builder. First, nothing behind the stucco should block the bottom of the drainage plane and ventilation space. Whether the builder uses a weep screed or drip edge at the bottom of the wall, it’s imperative to ensure that the stucco subcontractor doesn’t clog the bottom of the rainscreen gap with stucco. That would ultimately defeat the purpose of creating a drainage plane as the moisture would get still get trapped at the bottom instead of draining out.
Also, like always, proper flashing around windows and exterior doors (head flashing, flashing tape or liquid-applied, sill pan flashing, etc.) needs to be installed just right to prevent moisture damage from occurring. Even if stucco is installed properly, incorrect installation of flashing around windows and exterior doors can create areas of moisture penetration and damage.
Moral of the story: Be sure to evaluate which of your custom builder candidates prioritizes continual learning and development when it comes to building science. You want your custom builder to be updated on the most current best practices when it comes to building methods and materials so that your home will be healthier, higher performing, and built well enough to stand the test of time. In short, choose an experienced, high-quality builder to build your custom home.


COMMENT ON THIS ARTICLE